One of the most frequently asked questions by our wetland delineation students is, “what type of soil auger should I buy?”
A quick browse through any of the forestry supply companies’ catalogs and you are quickly overwhelmed. Who would have thought that there we so many different types of soil augers? Some of them are quite expensive. Many are modular and you end up buying part of an auger and have to order more parts. You do not want to drop a grand on an auger only to find out it is not what you needed or expected.
To help you get a handle on this, I have put together a pros and cons list of the most common soil augers used for wetland delineation. This list is based on my personal field experience with these augers. Each has its place so be prepared to buy a few. I do have a favorite all-around auger which I will also cover, but I own a bunch!
Tube Sampler

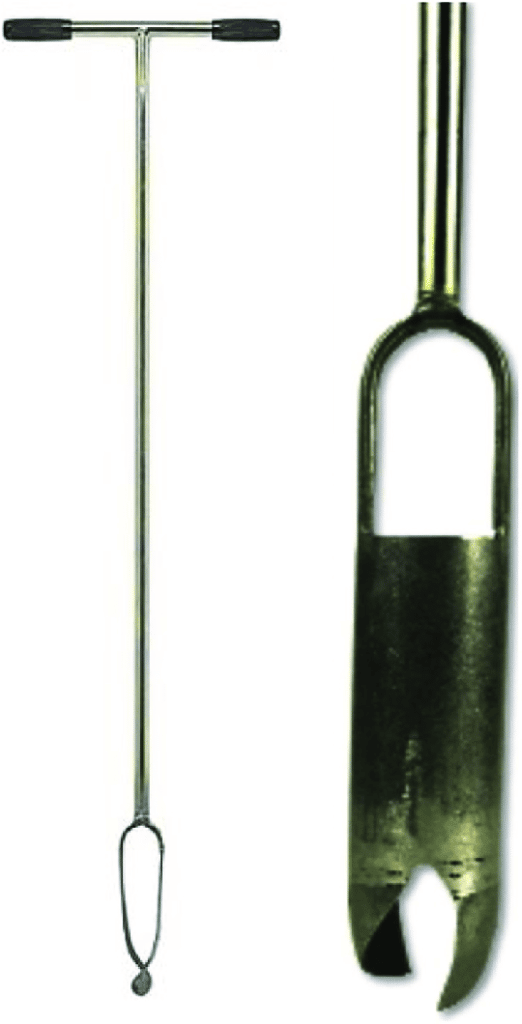
This is a favorite for the beginning wetland delineator. One of its biggest assets is that it is the cheapest, however, it has limitations. The basic construction is a simple tube that is cut open at the bottom. There is usually about a 16-inch half pipe slice that is used to examine the soil profile in-situ. The very end is a ring that everyone gets their fingers stuck in. A good one is about 24 inches in length with an opening extending about 16-18 inches. There is a short t-handle on the top. Sometimes this is detachable with a screw fitting. Others have the handle welded on. The former is a bit more expensive. One of the biggest advantages of this type of auger is the small footprint it makes. In glacial regions, it is sometimes the only auger that can get in between the rocks. It is also very handy for quick assessments. The biggest disadvantage is the relatively small amount of soil sample this auger extracts. Oftentimes, it just is not enough sample to make a wetland determination. Small rocks are also a problem as they will plug up the tube end. The issue of cleaning the sampler end out is also a challenge. It is sharp and just the right size to get your finger stuck. Use a stick to clean it out!
Screw Sampler

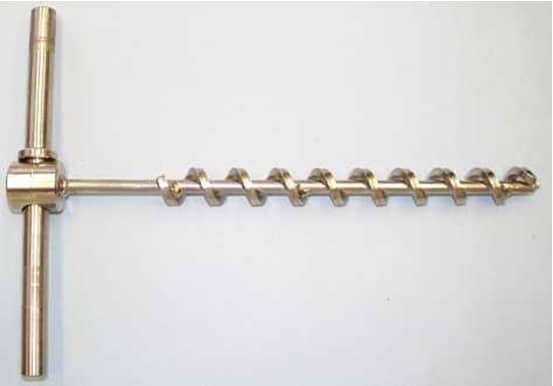
This auger looks like a giant corkscrew. The screw is about a foot long and is about 2-3 feet in total length. The screw is usually attached by extension bars that can be added to achieve a comfortable length. It has a slightly larger footprint than the tube sampler and is similarly useful in glaciated regions. The biggest challenge with using this auger is the ability to measure the thickness of a hydric soil feature. The screw blades are about .5 inches thick. This results in a stretching of the soil sample. It is hard to estimate how thick a feature may be using this auger. It also provides a very small soil sample.
Bucket Auger

This is probably the most common type of auger used by soil scientists, however, it is not necessarily used by wetland delineators. The basic design looks like a coffee can with one end open and the other end having two blades welded onto it. An extension bar connects in between the bucket and a t-handle on the top. All of these items can be customized to fit the user’s needs.
If you are just starting out in wetland delineation, you will probably be handed one of these bucket augers. There always seems to be one hiding in the office closet. Someone bought it, used it once, and there it sits.
I do not have a lot of pros to offer with this type of auger. The biggest problem is that it grinds up the soil profile, making it very hard to distinguish the hydric features of the soil. It also requires that once you auger down and grab a sample, you then have to tip the bucket upside down and bang out the sample. This also obscures the features. Soil scientists like these augers because they are trying to obtain a discrete sample at a specific depth. This is usually why the extension bars are so long. I have seen some augers used in the field that were over 6 feet long.
Dutch Auger (My Favorite)

This auger was made for wetland delineations. It is a double blade at the end of an extension bar and t-handle. It cuts a very nice sample without disturbing the profile integrity. You can usually auger down several feet fairly easily and lay out the samples in more or less the same way they would be found in the pit. You also get a decent amount of samples to play with. There are a number of brands and styles for this type of auger. The biggest difference between the individual styles is represented by the size and pitch of the blades. The original use of the Dutch auger was for muddy soils. However, there have been many modifications to the design. There is such a thing as a combination auger that works well in loamy soils as well as mud.
Sharp-Shooter

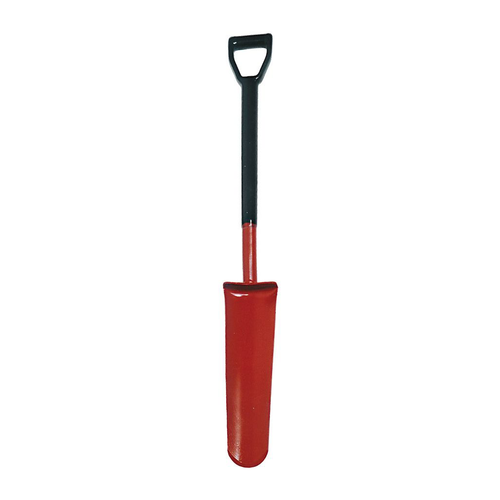
This is also known as a tree planting spade. It is simply a shovel that is 4 inches wide and 16 inches long. It digs a small hole and cuts a nice sample. In a pinch, this shovel will work in almost any circumstance. The biggest advantage to this sampler is the cost. You can pick one if these up in your local home improvement center for about $25. Most of the other augers mentioned are well north of $200. The biggest downside to this device is the work associated with it. Digging a hole is a lot of work. You get a nice amount of samples and you can even cut a nice sidewall to see the profile. However, this typically takes a lot of work due to the size of the spade.
Quick Connect or Not

One last note on the issue of quick connects. To be frank, I have yet to see one of these work once they were put to use in the field. The fittings get gummed up with dirt and the quick connect jams. I would suggest going with an all-welded design. You are not going to take these apart anyway so why spend the extra money? If you need to travel by airplane, TSA is not going to let you carry these on, so there is no need to break them down. Just check them, or better yet, buy a shovel for $25 when you get to the job site.
